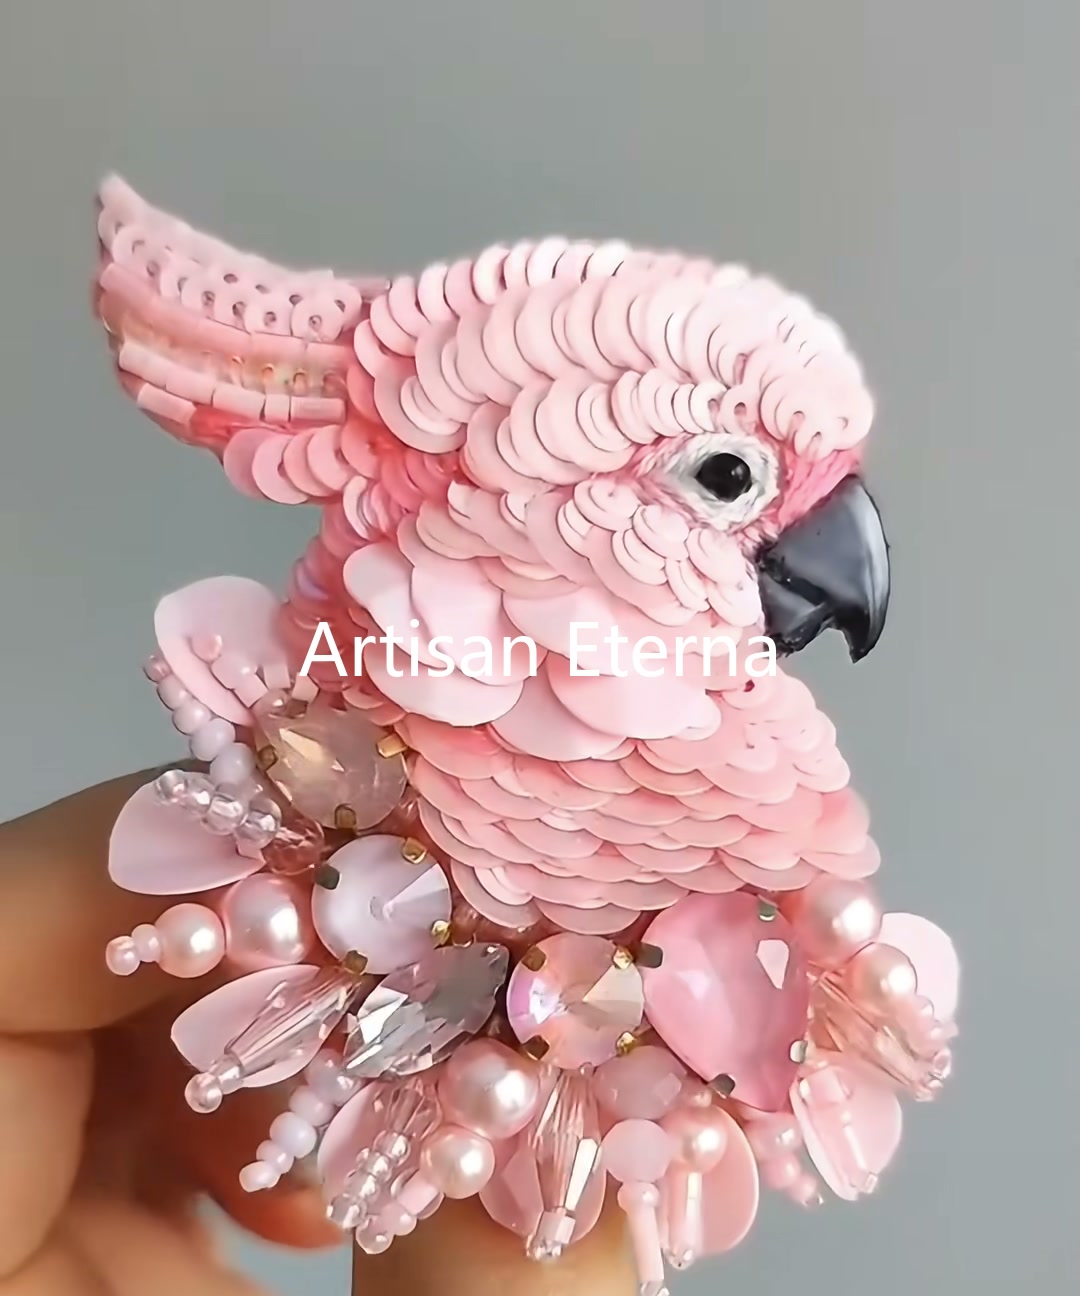
The Pink Cockatoo — A Beaded Brooch in Sequins and Pearls
The Pink Cockatoo — A Beaded Brooch in Sequins and Pearls
Some brooches are quiet. This one is not. The pink cockatoo began as a scribble of red chalk on a square of wool felt — a wing, a crest, a curl of feather above the eye. Hours later, that outline was buried under thousands of pink sequins, teardrop pearls, and faceted crystals, and the small bird in my sketchbook had become something you could wear on the collar of a coat.
This is a slow piece. It rewards patience. It also rewards the kind of hands that don't mind picking up a single sequin with a needle, ninety times in a row, to get one row of feathers right.
Materials & Tools
- Pink wool felt, 1.5 mm (one 10 × 10 cm square for the body)
- Red fabric marker or chalk pencil
- Embroidery needle, size 10
- Pink embroidery thread, size 12 (two spools: matte and satin)
- Black glass bead, 4 mm (for the pupil)
- Curved black cabochon (beak)
- Pink round sequins, 4–5 mm (two shades: blush and rose)
- Pink teardrop pearls, 6 × 8 mm
- Faceted crystal beads (oval and marquise cuts in pink, rose, and clear)
- White pearl beads, 3 mm
- Brooch pin back, 2.5 cm
- Fabric glue
- Small sharp scissors
1 — Sketch the Bird on Felt
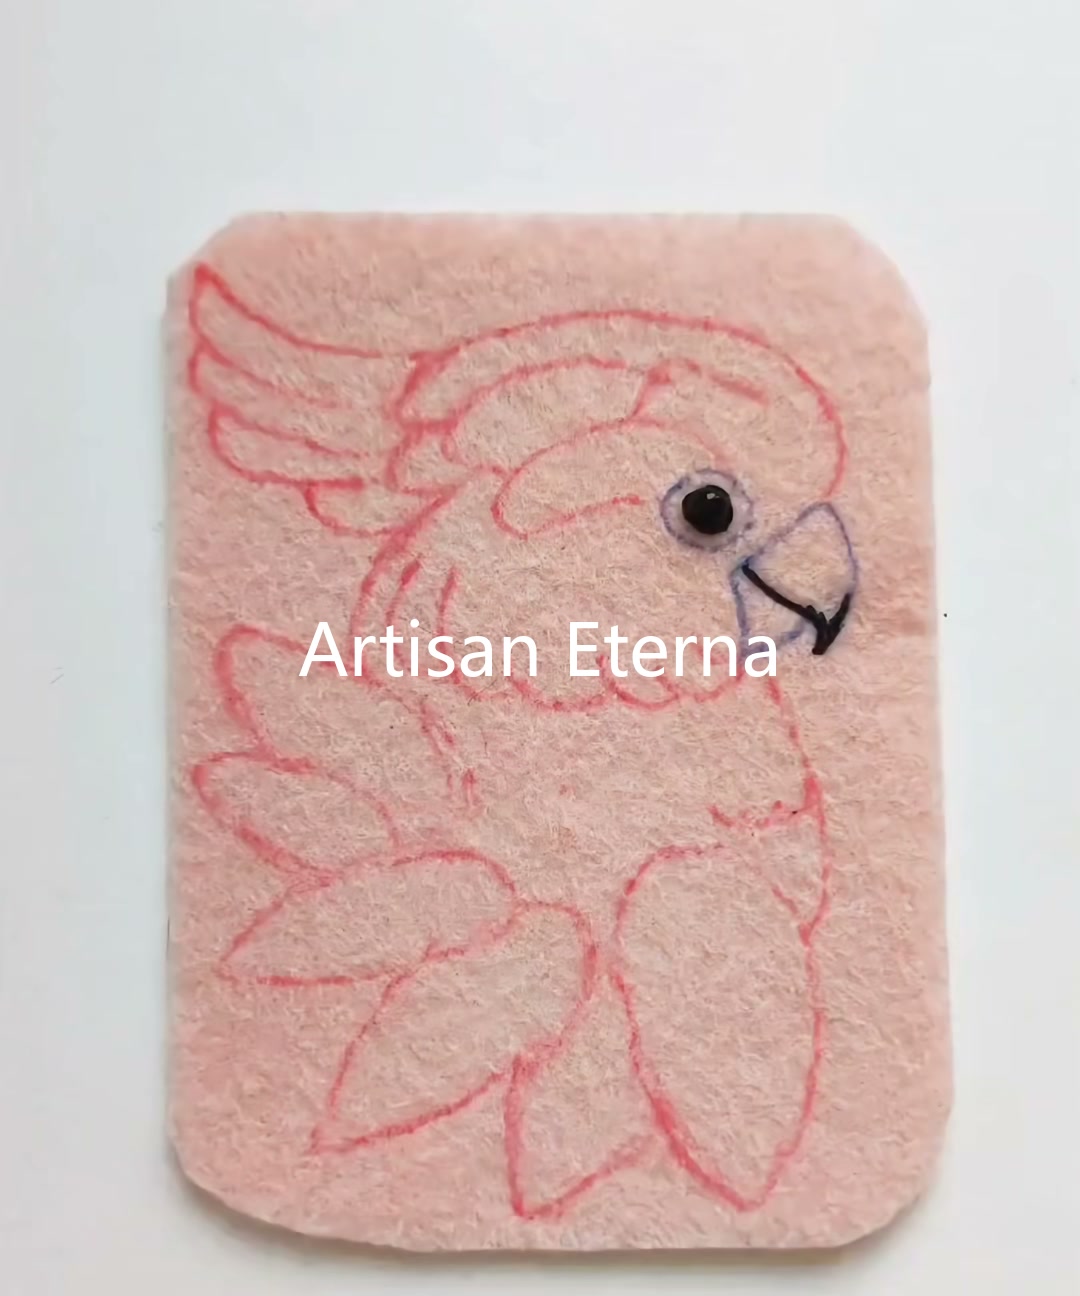
Cut a square of pink felt. Draw the cockatoo freehand with a red fabric marker — a rounded head, a swept-back crest, a curved wing, a small fanned tail. The shape does not need to be perfect. I draw slowly, and I redraw twice before the first stitch.
Once the outline feels right, mark the eye position with a small dot and place a 4 mm black glass bead there. Anchor it with two passes of pink thread, then begin a tight circle of purple-pink satin stitches around the bead. This halo of stitches will become the eye's white — keep the circle round and the tension even.
2 — Add the Beak and Finish the Eye
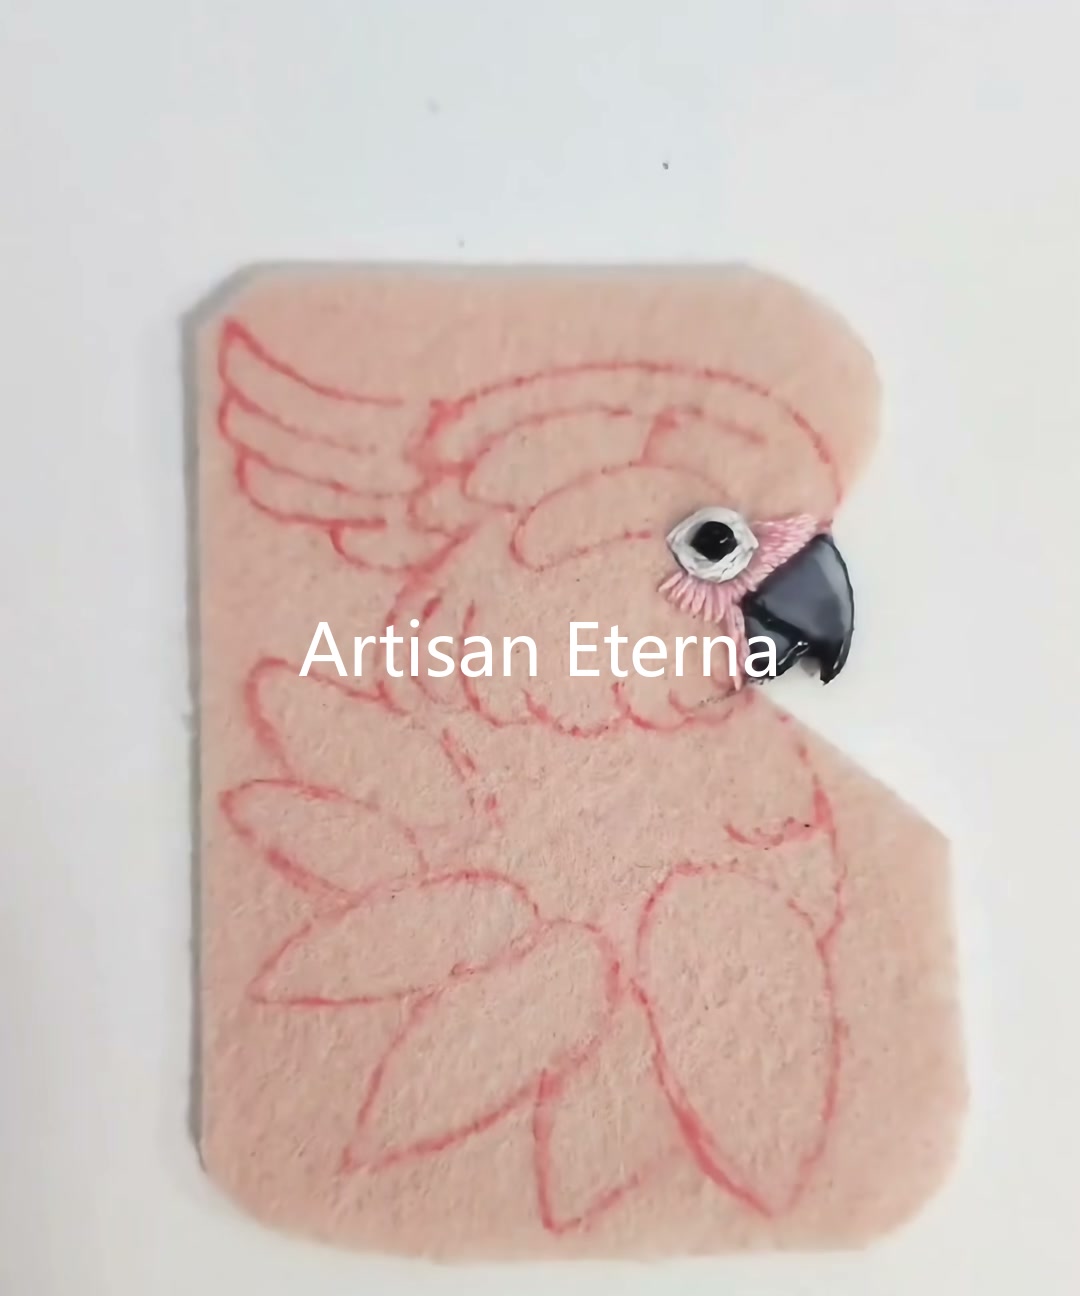
Place the curved black cabochon directly below and to the right of the eye, so it points outward like the bird is looking over its shoulder. Stitch it down with a few small, hidden stitches through the felt along the curve of the beak.
Now return to the eye and complete the satin-stitch halo. The white thread should fill the circle around the black bead completely, with no felt showing through. Work in tight, overlapping straight stitches, keeping the circle round and the tension even — a loose eye will sink into the beadwork once the sequins start piling up around it.
3 — Place the Chest Crystals
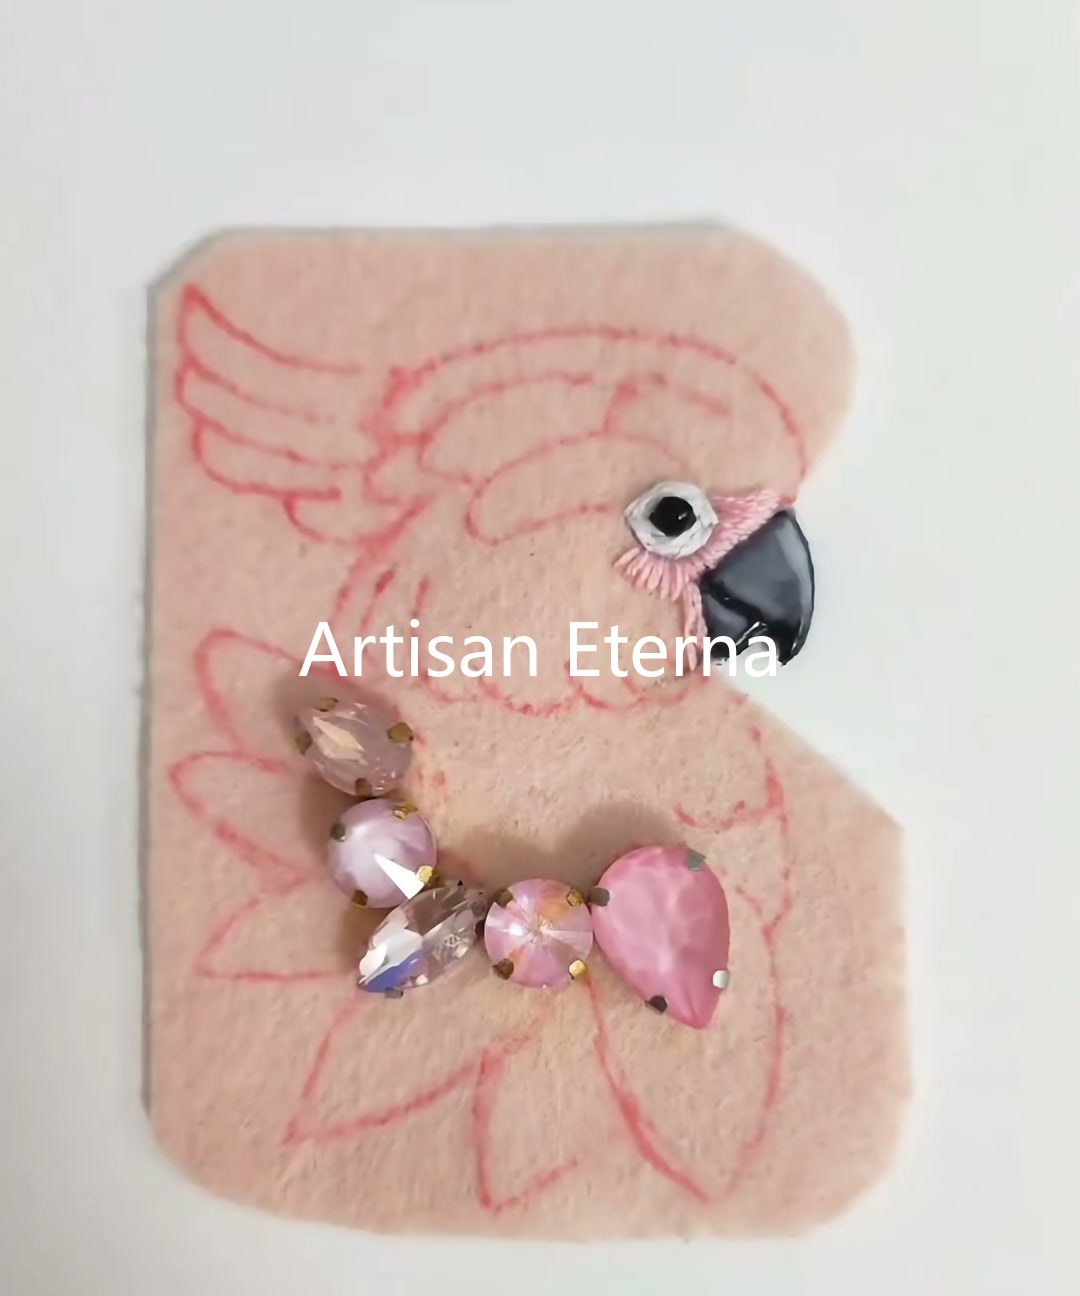
Before filling anything in thread, lay out the centerpiece stones on the chest — a pink oval crystal, a clear marquise, a rose-colored teardrop pearl, a smaller pink gem. Move them around with tweezers until the cluster reads as a soft bouquet rather than a tight pile.
Once the composition feels right, stitch each stone down one at a time, anchoring through the holes in the metal settings. Use pink thread that matches the felt. The crystal cluster will sit on top of the sequin plumage later, so the stitches underneath will be hidden — but keep them tidy anyway. Hidden work has a way of being discovered.
4 — Begin the Plumage Below the Chest
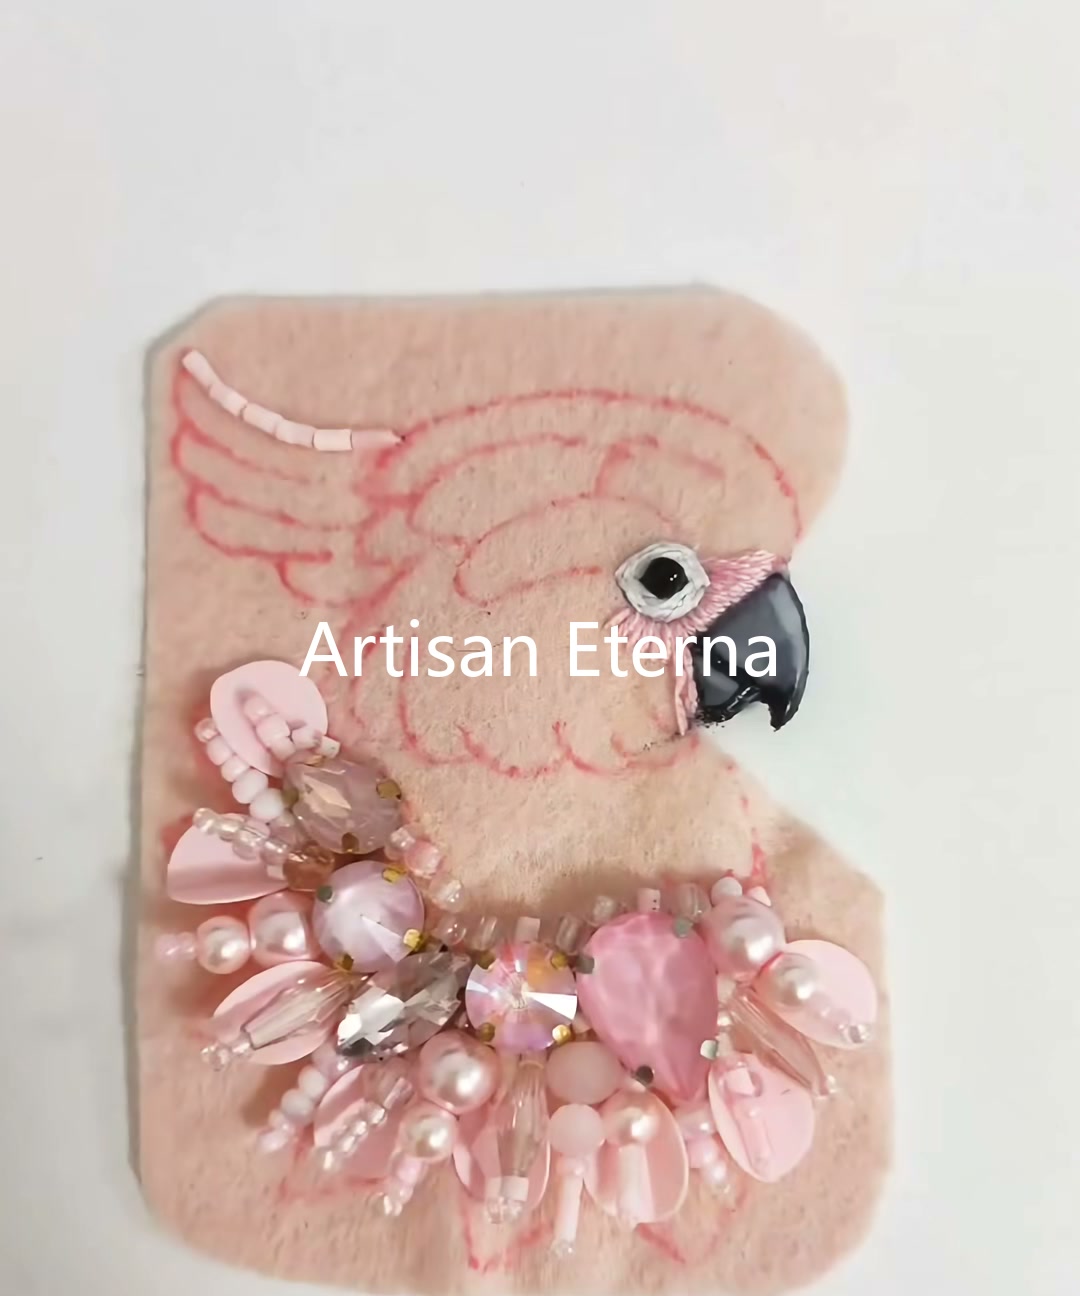
The plumage begins just below the chest crystals. Thread a single pink sequin onto the needle, pass down through the felt, and come back up through the sequin hole — the same motion as bead embroidery, but with a flat disc instead of a sphere. Work in overlapping rows, each sequin covering the thread of the row below, like fish scales or roof tiles.
Tuck small teardrop pearls and clear faceted beads between the sequin rows as you go. They break up the matte surface of the sequins and add small points of light that read as feather highlights. Let the rows follow the curve of the wing and the roundness of the belly — do not lay them in straight lines; the bird has no straight edges.
5 — Cover the Body and Shape the Cheek
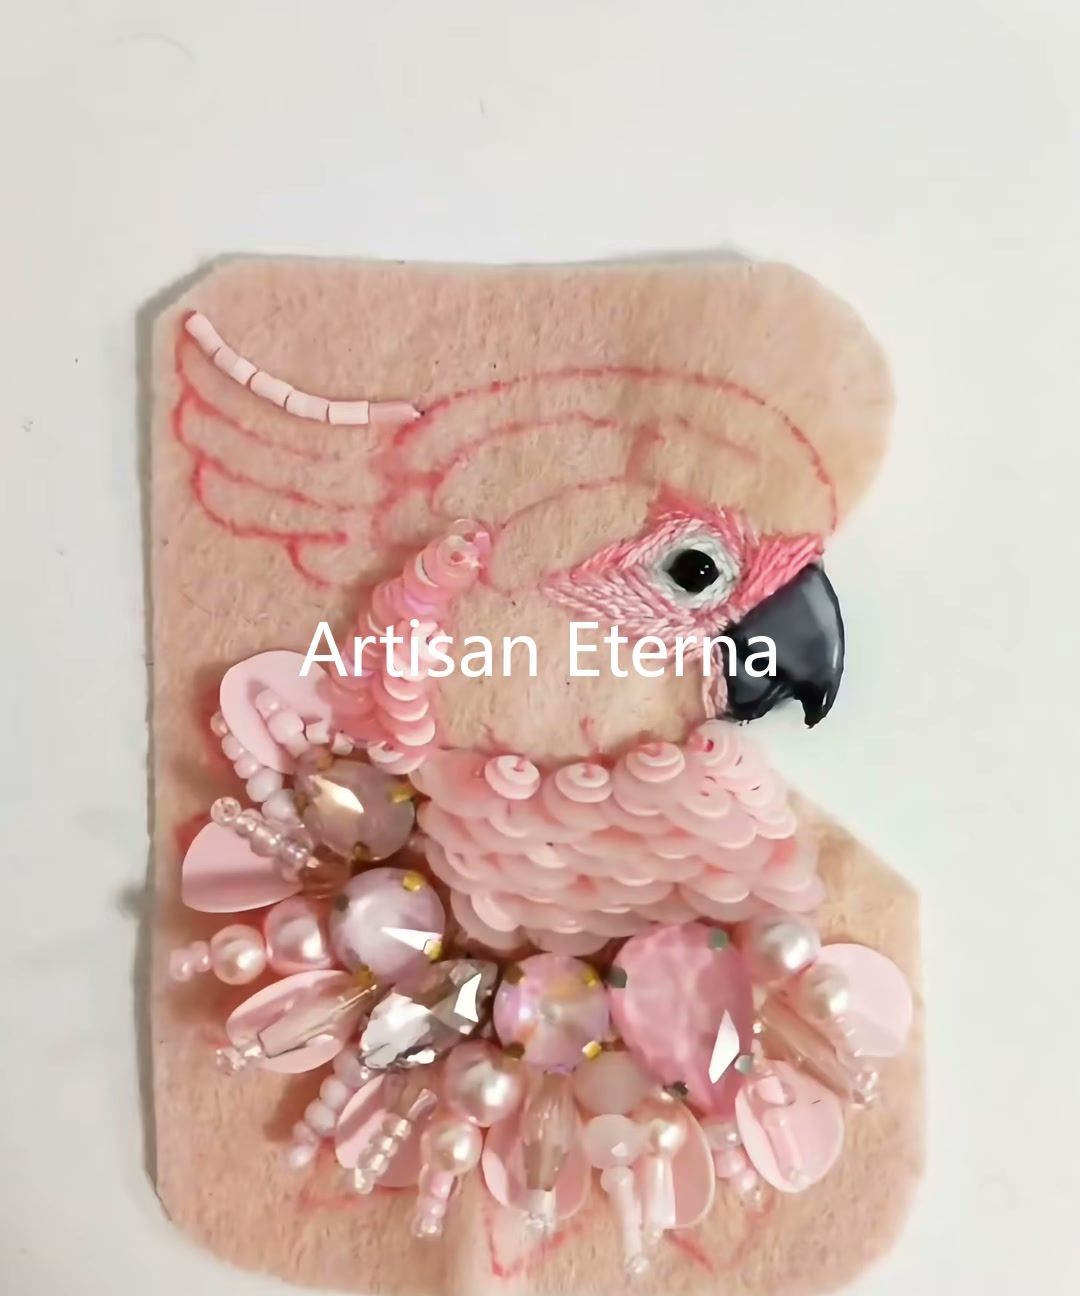
Continue the sequin rows upward from the lower body, fanning them around the belly and up the sides of the chest. The plumage will meet the bottom of the chest crystal cluster without a hard line — let the sequins curve gently inward at the top of the breast so the crystals appear to sit on top of the feathers rather than beside them.
Switch stitch now and again to outline the cheek and brow. A few short satin stitches radiating outward from the eye — pink thread on pink felt, with each stitch slightly longer than the last — give the impression of soft cheek feathers without filling the area entirely. This is the moment when the bird starts to look like a bird and not a sequinned shape.
Add small white pearl beads between the sequin rows at the throat and around the wing edge. These pearls are functional as well as decorative — they hide the joins between rows and add a soft, sculptural finish to the matte sequin field.
6 — Finish the Head, Crest, and Backing
The head and crest are the most demanding area. The sequins here are smaller, the rows tighter, and the curve of the swept-back crest requires a quick change of direction with almost every stitch. Let the feather pattern radiate outward from the eye, as if the crest is being blown back by a breeze.
Work in two shades of pink — the softer blush on the face, the warmer rose on the crest — so the bird has dimensional plumage without ever needing a third color. Finish the tip of the crest with a single row of long oval sequins laid like fish scales along the edge.
Trim the felt close to the outer edge of the plumage, leaving a 1 mm border of pink felt visible all the way around. This thin felt halo is the signature of a hand-finished brooch — a machine-cut edge would be sharp and even, but the felt halo reads as soft, as if the bird is made of fabric and not stone.
Cut a second piece of pink felt to match the silhouette of the bird, slightly smaller. Glue this to the back of the brooch to hide the threads. Stitch the pin back through both layers of felt, anchoring it firmly with a small square of backing felt for strength.
The Finished Bird
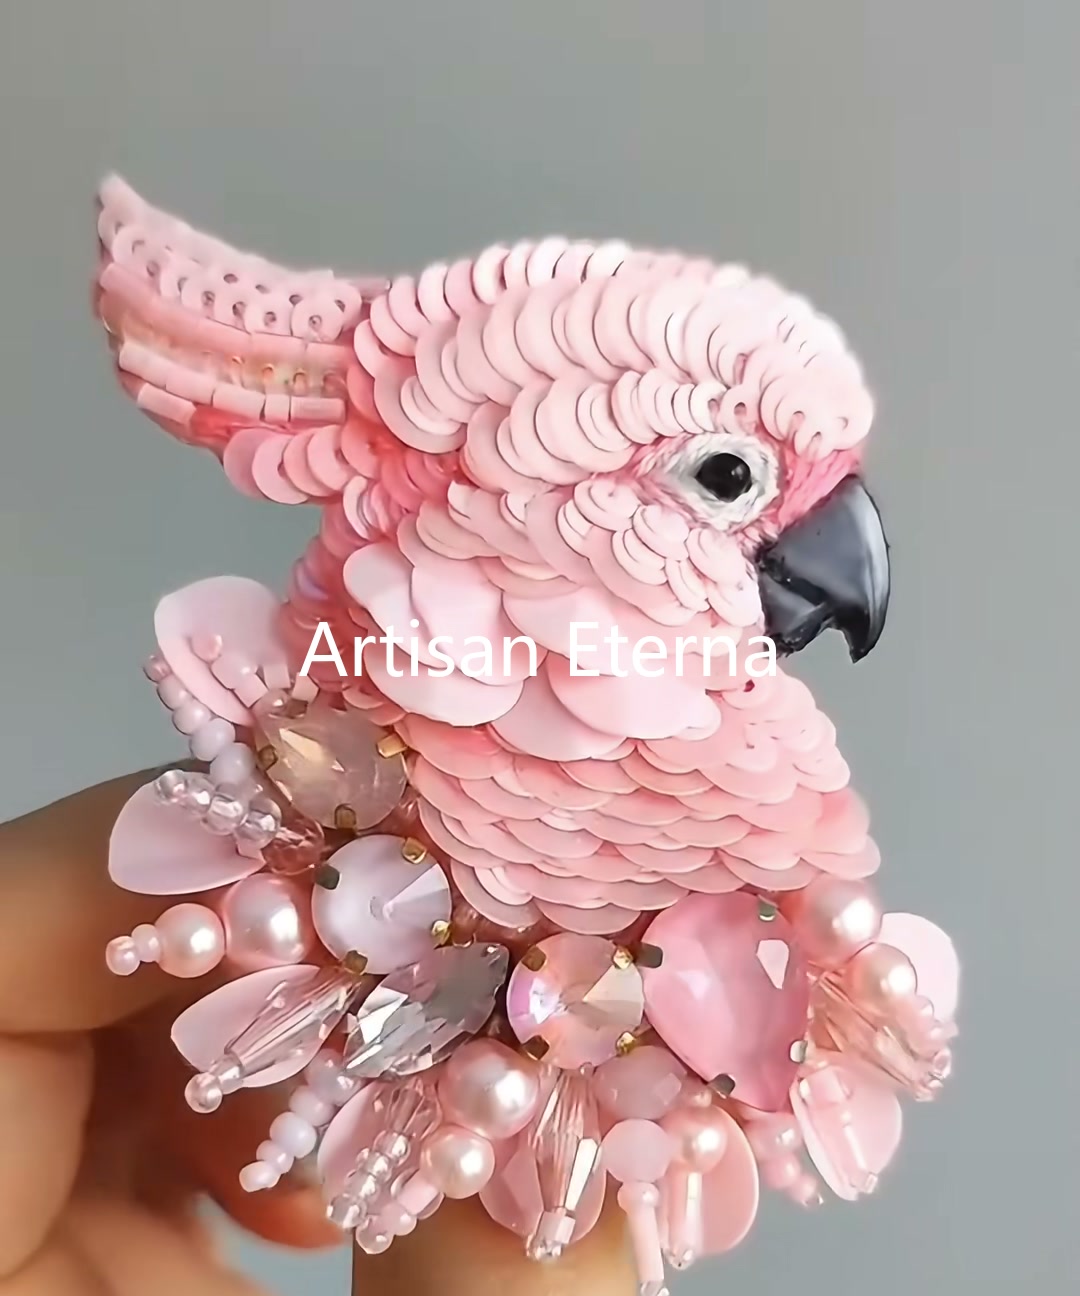
Hold the finished cockatoo in your palm. The crystals on the chest will catch the light first, then the wing, then the crest — the bird has a built-in choreography of sparkle that you did not plan but could not have avoided.
Pin it to a coat. Pin it to a tote bag. Pin it to the lapel of a jacket you only wear on Sundays. The bird doesn't mind where it lives. It only knows it was made by hand.
Happy beading — one feather at a time.